DIY Home Drying After Water Damage in Brownstown
The first instinct after a leak or flood in your Brownstown home is usually the right one: grab towels, open windows, push water toward the door. That early response matters, and we will never tell you it was wasted effort. The harder question comes a few hours later, once the visible water is gone and the floors still feel cool, the baseboards still look dark, and a faint musty smell starts settling into the room. That is the moment most homeowners ask Brownstown Water Restoration whether they can finish the job themselves or whether they are about to make things worse.
We are an IICRC S500 and S520 certified crew, and we have walked into hundreds of homes where the owner did real, useful work in the first hour. We have also walked into homes where a week of box fans and cracked windows turned a $2,500 mitigation job into a $14,000 reconstruction with mold remediation layered on top. The honest answer about drying your home yourself sits somewhere in the middle, and it depends on what kind of water you are dealing with, how far it traveled, and what materials it touched.
Step 1: Verify the Water Category Before You Touch Anything
Before any drying begins, classify the water. This is not optional. It dictates whether DIY work is safe at all.
- Category 1 (clean): Supply line break, ice maker line, sink overflow with no contaminants. DIY drying is possible if addressed within 24 to 48 hours.
- Category 2 (grey): Dishwasher discharge, washing machine drain, aquarium. Requires extraction and antimicrobial treatment. Marginal for DIY.
- Category 3 (black): Sewage, toilet trap backflow, flood water, any standing water older than 72 hours. Not a DIY situation under any circumstance.
Review the breakdown in our water damage category guide if you are unsure. Misclassifying Category 3 as Category 1 is the single most common DIY mistake we see in Brownstown. A second common error is assuming Category 1 water stays clean. Once supply water sits on flooring for more than 24 hours, contacts drywall paper, or passes through ceiling cavities, it degrades to Category 2 by definition.
Step 9: Know the DIY Stop Points
Stop drying yourself and call a certified crew if any of the following occur:
- Moisture readings plateau for more than 48 hours.
- Any musty odor develops at any point.
- Drywall remains above 18 percent moisture after 72 hours of equipment runtime.
- The affected area exceeds 150 square feet of flooring.
- Water reached subfloor, wall cavities exceeding 24 inches in height, or insulation in more than one bay.
- Hardwood flooring shows cupping, crowning, or buckling.
- The loss involves a multi story path where water traveled through a ceiling assembly.
Step 2: Shut Off the Source and Document the Scene
- Close the main water valve or the localized shutoff for the failed fixture.
- Cut electrical power to the affected zone at the breaker if water is within 3 feet of any outlet.
- Photograph every wall, baseboard, floor, and ceiling section before moving anything. Include wide shots and close ups.
- Record the time the leak started, the time it was discovered, and the approximate gallons involved.
- Save the failed component (burst hose, cracked valve, supply line) in a sealed bag for the adjuster.
- Note the brand, model, and age of any appliance involved.
Documentation matters for insurance. Our water damage insurance claim process guide covers exactly what adjusters expect.
Step 8: Measure Moisture, Do Not Guess
- Buy or rent a pin type moisture meter ($40 to $150 range).
- Take a baseline reading in an unaffected room. Drywall should read 12 to 16 percent. Wood framing should read 8 to 15 percent.
- Log readings in the wet area every 24 hours at the same locations.
- Drying is complete when wet area readings match the unaffected baseline for two consecutive days.
- Also log chamber temperature and relative humidity at each check. A drop in RH without a drop in material moisture indicates trapped water behind a surface.
If you suspect moisture behind surfaces that look dry, review the indicators in our guide on signs of hidden water damage.
Step 10: When to Call Brownstown Water Restoration
If any stop point is triggered, dispatch is the next move. Brownstown Water Restoration crews in Brownstown respond within 2 hours in most cases, arrive with truck mounted extraction, multiple LGR units, and thermal imaging to confirm cavity moisture.
- Have your category determination, photos, and moisture logs ready at the door.
- Identify shutoff locations and breaker panel access for the technician.
- Clear a 3 foot path to the affected zone for equipment staging.
- Expect a written scope, drying plan, and daily moisture documentation through completion.
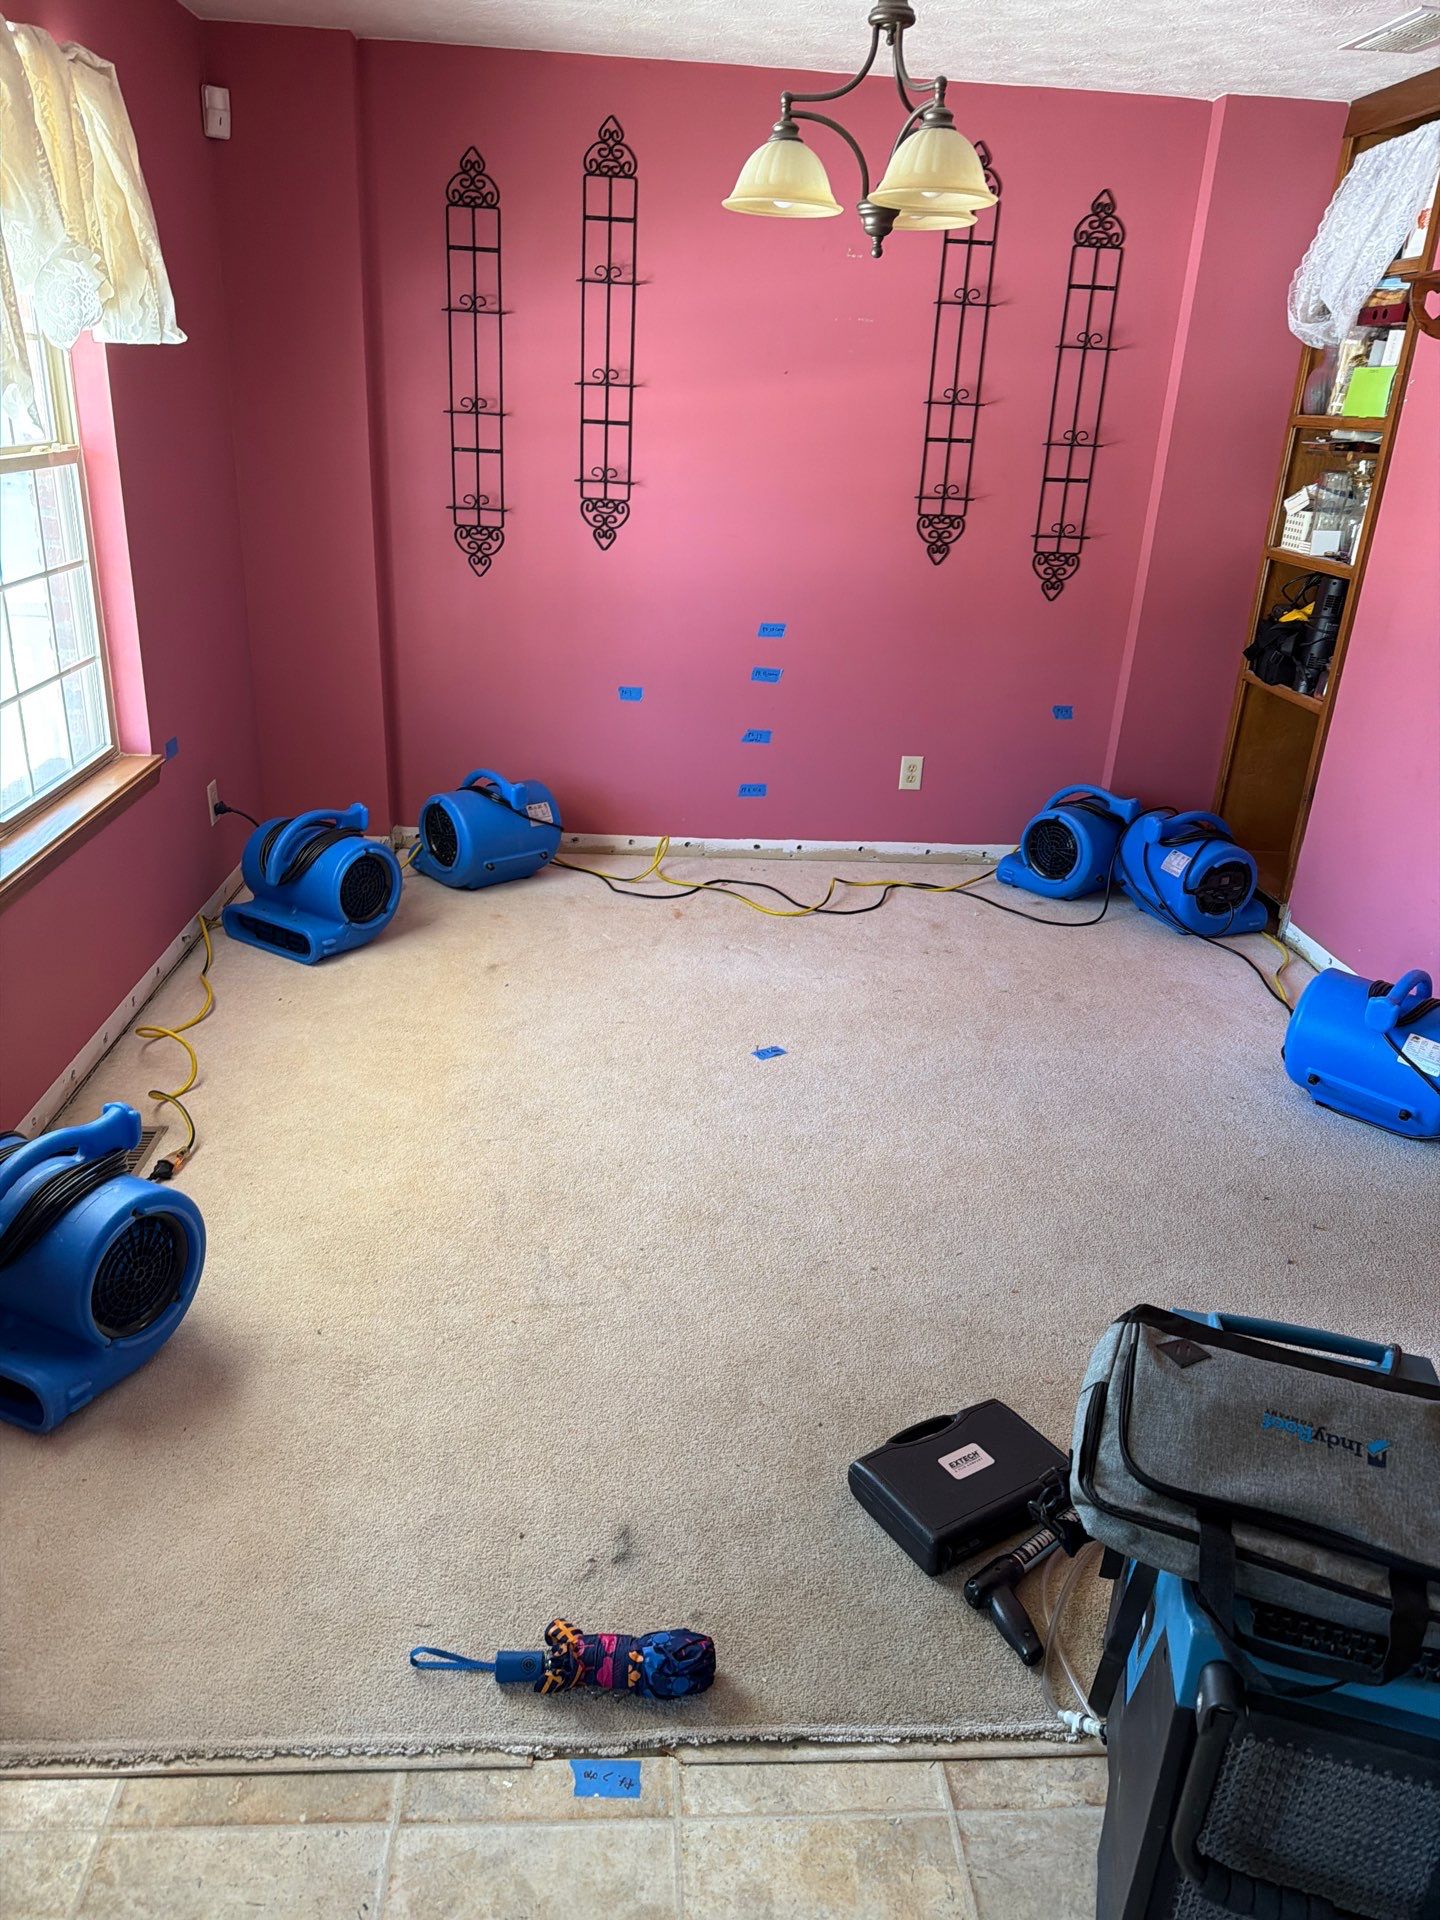
Step 6: Deploy Airflow at Correct Volume
- Use a minimum of one high velocity air mover per 50 to 70 linear feet of wall, angled at 15 to 45 degrees toward the wet surface.
- Rental axial fans should deliver at least 2,800 CFM. Box fans do not generate enough velocity to evaporate trapped moisture.
- Position movers in a clockwise pattern around the room to create circulation, not opposing flow.
- Run continuously for a minimum of 72 hours. Do not shut equipment off overnight.
- Reposition movers every 24 hours by 6 to 8 feet to prevent dead zones along the perimeter.
Step 5: Establish the Drying Chamber
Containment concentrates your airflow and dehumidification. Without it, you are trying to dry the entire house.
- Close doors and windows in the affected zone.
- Seal HVAC supply and return vents in the wet area with plastic and tape.
- Hang 6 mil poly across open doorways if you must isolate part of a larger room.
- Target chamber size: keep the affected area under 400 square feet per dehumidifier.
- Maintain interior chamber temperature between 70 and 90 degrees Fahrenheit. Evaporation rate drops sharply below 70.
Make the Call Before the Damage Spreads
Drying your home yourself can absolutely work for small, clean water spills caught quickly, and we respect any homeowner who takes that first action. The risk is in assuming surface dry means structurally dry, because the two are rarely the same. If you are uncertain about how deep the moisture went, or you are starting to notice signs that something is still wet inside the walls or floor, reach out to Brownstown Water Restoration for a free assessment in Brownstown. We will give you straight answers, no pressure, and a clear path forward whether you finish the work yourself or let our certified crew take it from here.
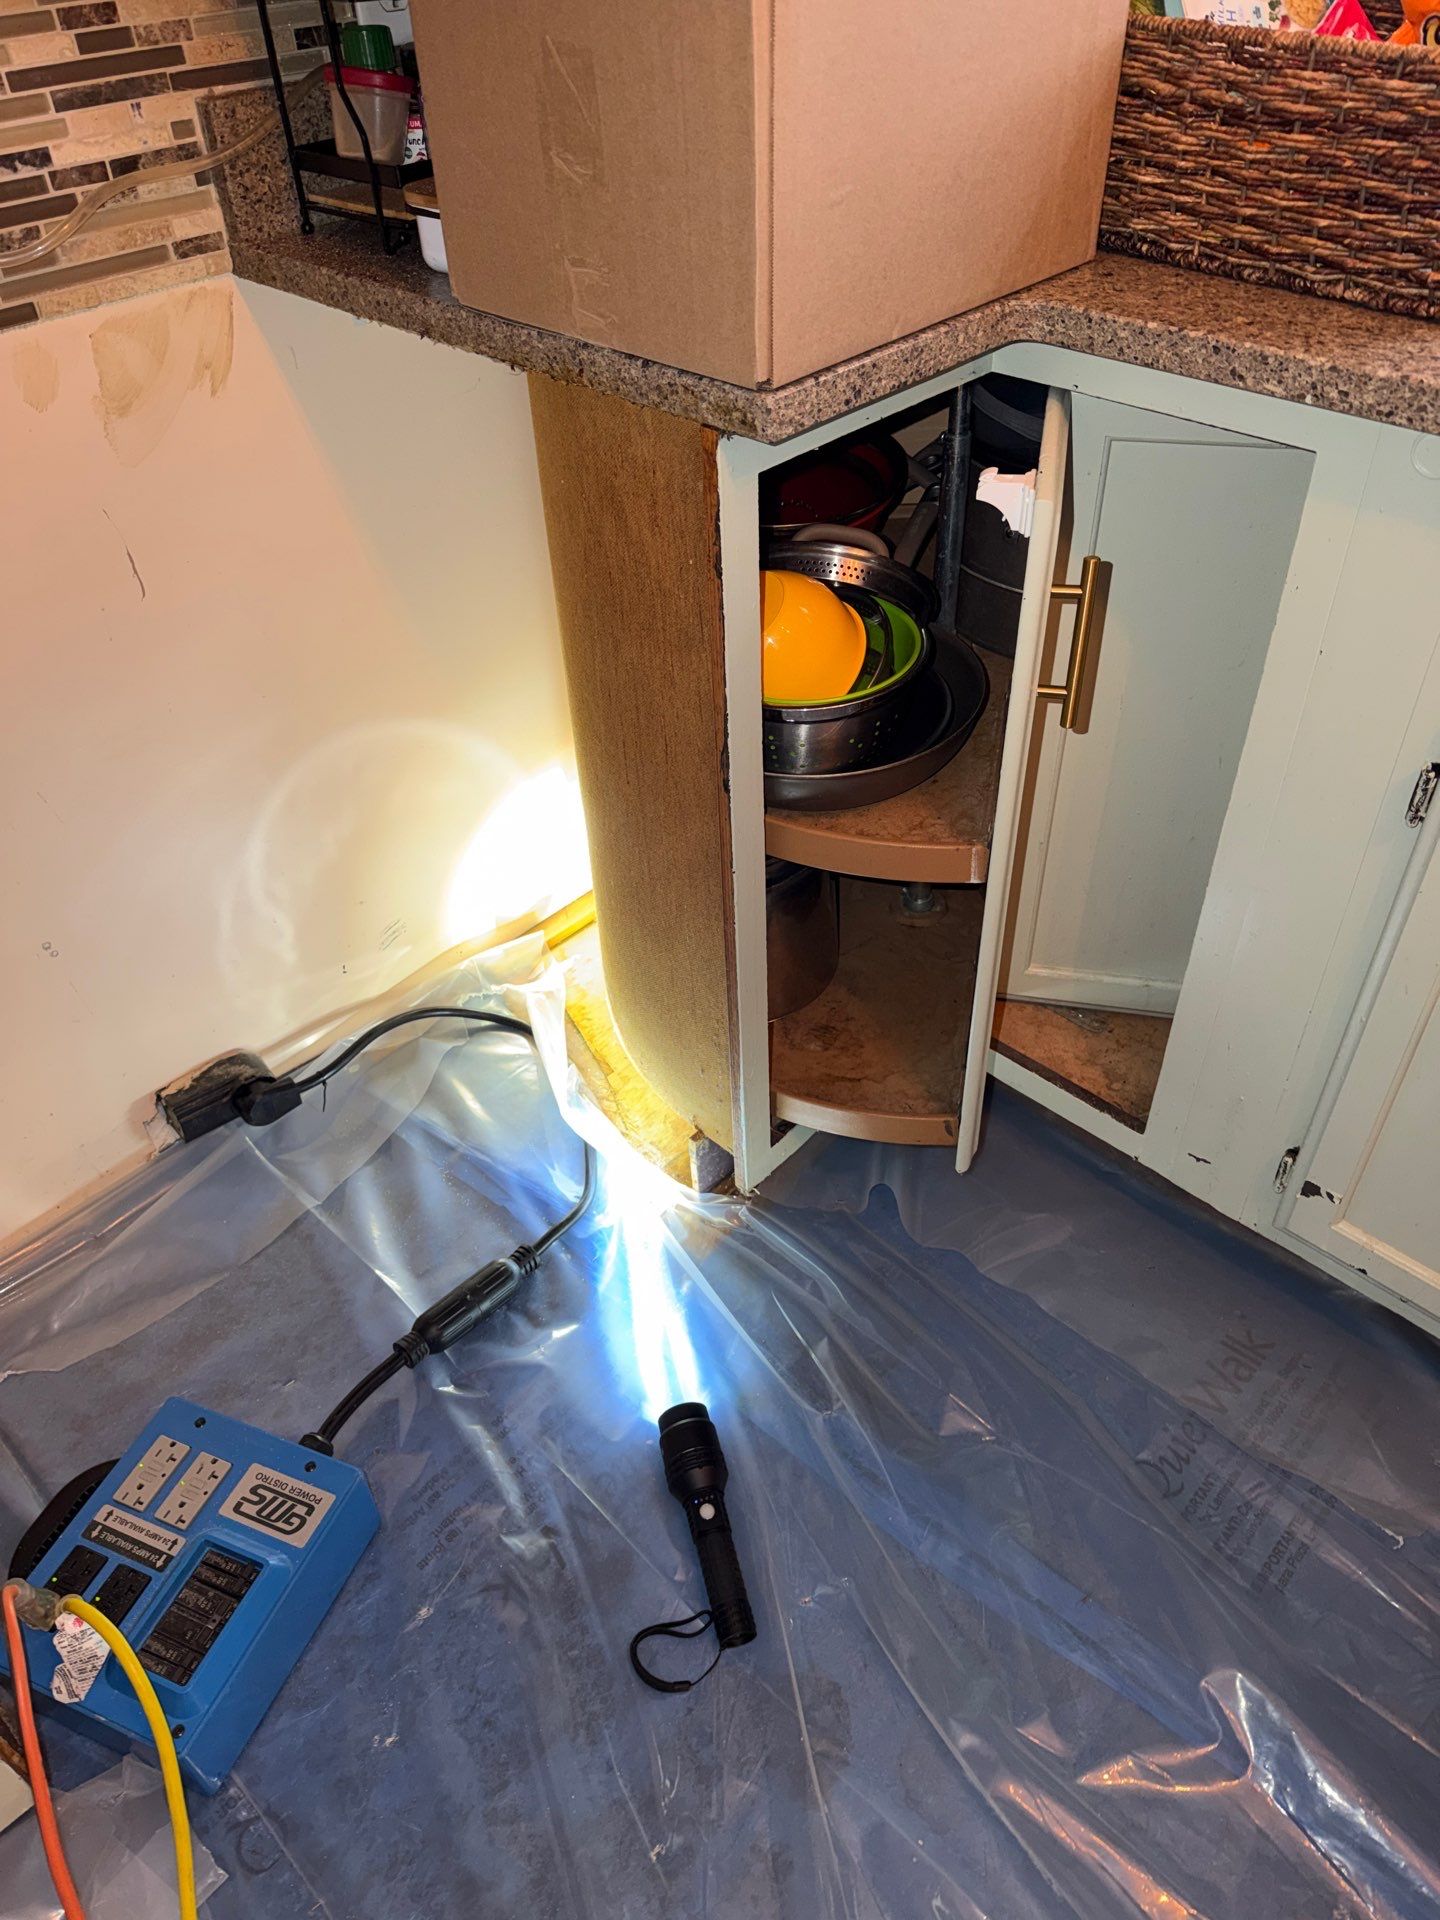
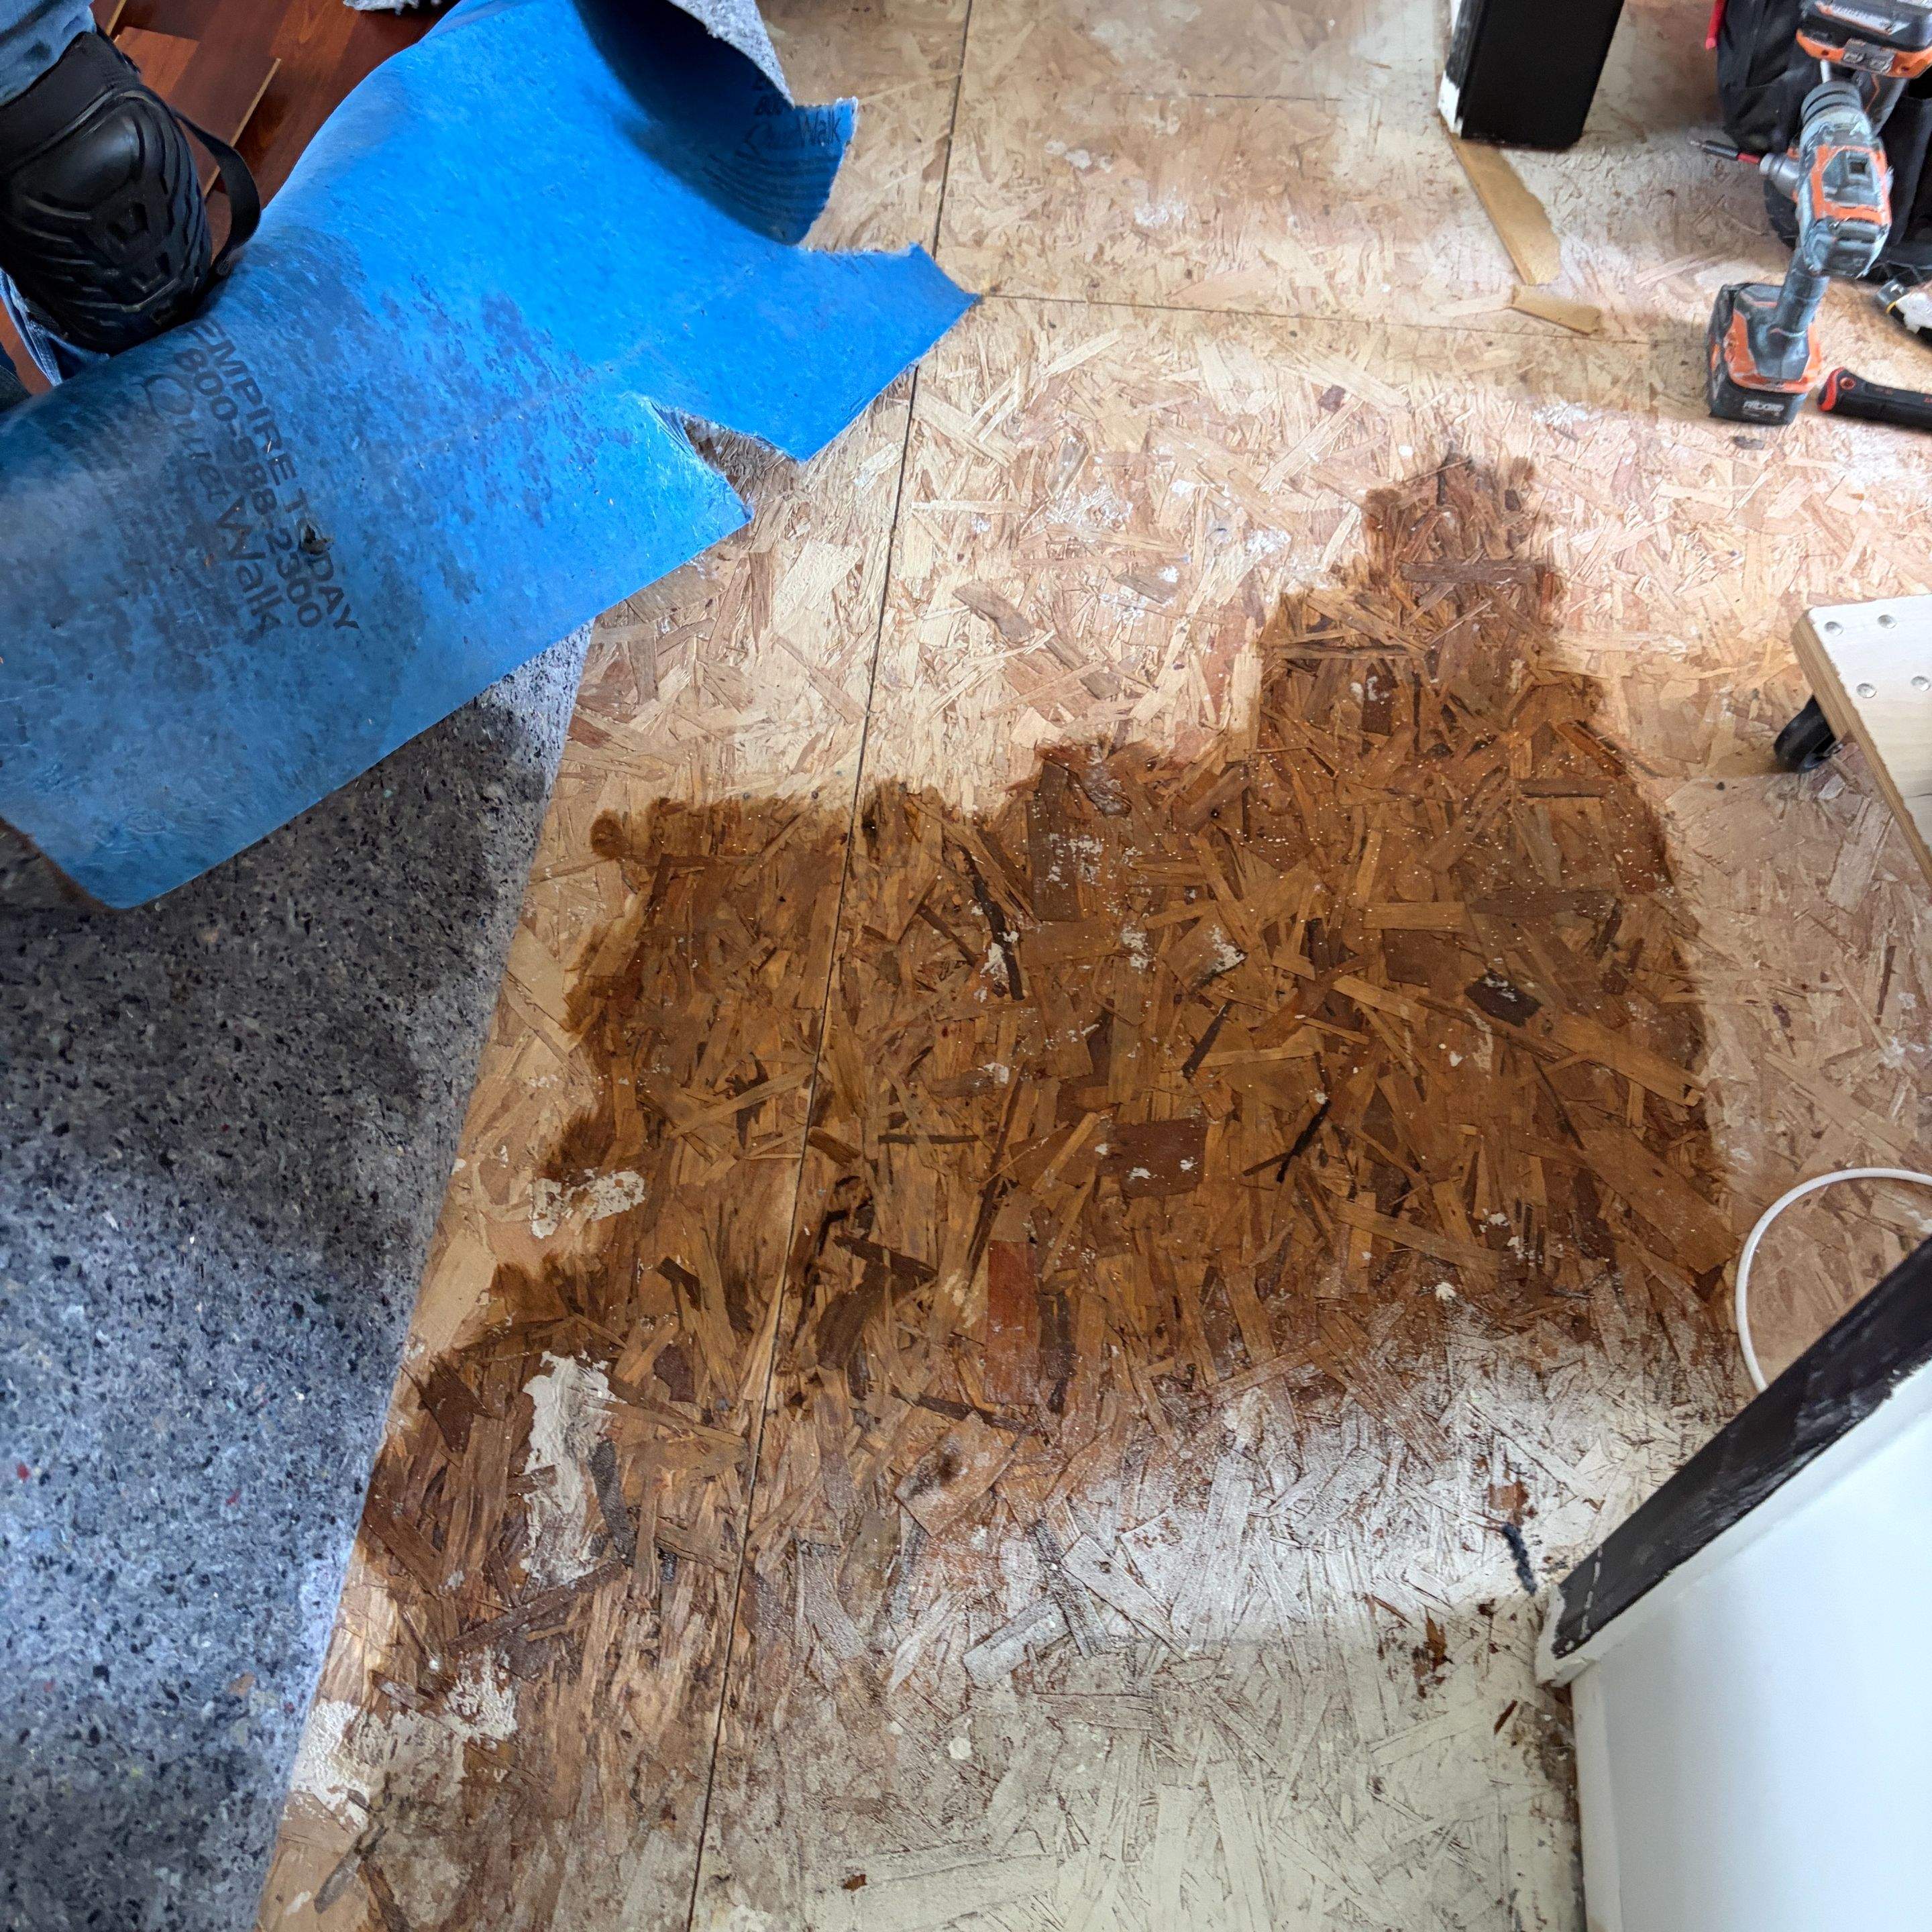
Step 4: Remove Wet Materials That Cannot Be Saved In Place
- Lift area rugs and move them to a hard surface for separate evaluation.
- Pull baseboards in affected rooms. Score the caulk line with a utility knife first to avoid drywall tear out.
- Cut drywall 12 to 16 inches above the visible water line using a horizontal chalk line. Drywall wicks moisture vertically.
- Remove and discard wet insulation. Fiberglass loses R-value permanently once saturated.
- Detach toe kicks under cabinets to expose the cavity behind.
- Drill 1 inch weep holes at the bottom of wall cavities you intend to dry in place, spaced every 16 inches on center.
- Remove door casings if water tracked into the jamb assembly.
Step 3: Remove Standing Water within 2 hours
- For volumes under 5 gallons, use towels and a standard wet/dry shop vacuum with a minimum 6 gallon tank.
- For volumes between 5 and 25 gallons, plan on 2 to 4 hours of continuous extraction with a shop vac, emptying every 15 minutes.
- Anything over 25 gallons of standing water exceeds DIY equipment capacity. Call for truck mounted extraction.
Wet carpet retains roughly 0.5 to 1 gallon per square yard. A 10 by 12 foot room of soaked carpet can hold 12 to 15 gallons even after surface extraction. The pad underneath holds another 1 to 2 gallons per square yard and rarely dries in place. In most water losses, pad replacement is faster and cheaper than extended drying attempts.
Step 7: Control Humidity With a True LGR Dehumidifier
- Target relative humidity: 30 to 50 percent inside the drying chamber.
- A consumer 50 pint dehumidifier removes roughly 30 pints per day under real conditions, which is undersized for any flood over 100 square feet.
- Rent a low grain refrigerant (LGR) unit rated for 70 to 130 pints per day. Cost runs $60 to $120 per day in most Brownstown rental yards.
- Drain to a condensate pump or a floor drain. Do not rely on the internal bucket.
- Place the dehumidifier centrally in the chamber, not against a wall, so intake and exhaust airflow are not blocked.
Frequently Asked Questions
How much water damage is safe to dry myself?
Small clean water spills under about 10 square feet, caught within two hours, on non porous surfaces are usually safe to handle yourself in Brownstown homes. Anything involving carpet pad, walls, or extended dwell time should be assessed professionally.
Will renting commercial fans give me the same result as a pro?
Air movers alone will not dry a structure. Without matched dehumidification, you simply move humid air around the room, which can actually spread moisture into dry materials. Brownstown Water Restoration balances both sides of the equation for every job.
How do I know if water got behind my walls?
Soft baseboards, bubbling paint, warm spots, or a musty smell are early signs. The only reliable confirmation is a moisture meter reading on the drywall and a thermal scan, both of which are included in a Brownstown Water Restoration free assessment.
If I start drying myself, can you still take over later?
Yes. We frequently pick up jobs that started as DIY in Brownstown. The earlier you call, the better the outcome, since mold can begin colonizing within 48 to 72 hours of materials staying wet.
Does insurance pay more if I try DIY first?
Usually the opposite. Delayed mitigation often reduces what carriers will cover. Documented professional drying from the start gives your claim the strongest footing with the adjuster.
Have a restoration question?
Our IICRC certified Brownstown crew is ready to help. Free assessments, written scopes, no pressure.